Arduino Phototransistor Signal Protocol

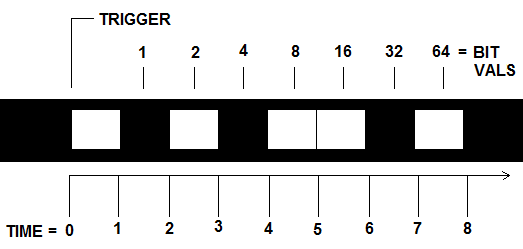
I’ve designed a signal protocol for the Arduino to convert phototransistor readings from the laptop screen into bytes of data. Here’s what I came up with today:

In the illustration, the white boxes in the black strip are light pulses on the screen which are shown as spread out across a time line. (Note that units of time have yet to be assigned.)

When the phototransistor signal goes high, it triggers (starts) the byte-reading cycle. By definition here, the start of the trigger pulse is t = 0. Thus the time line shown here is just for reading a single byte. (I’ll work on reading multiple bytes once I master reading a single byte.)

At time t = 1.5, the phototransistor voltage is read at Arduino pin A0. If the value is LOW, then the bit has a value of 0. If it is HIGH, you guessed it, the bit has a value of 1.

At time t = 2.5, the phototransistor is sampled again. If it is LOW, then the bit has a value of 0. If it is HIGH, now we’re assigning a value of 2.

And so on. After t = 7.5, all the bit values are added up to give a byte value from 0 to 127. And that tells me what my control code is.

After the last bit value is read, there is a delay of a quarter second, and then the trigger for the next byte can be sent. The reason for the delay is that I want each byte-reading to be started by a “clean” trigger because I don’t want to mess up the bit-reading frames, which I fear could rapidly get out of synch otherwise.

I’ve been having trouble with the Arduino IDE serial monitor (or maybe, it’s been having trouble with me), but I hope to test this protocol tomorrow.

Posted in Uncategorized | Tagged , , | 2 Comments

Arduino reads screen flashes with phototransistor

This is the first test of the communication system as described in the previous entry.

The flashes are one millisecond, followed by a one second delay. The serial monitor informs me that the microcontroller is able to count them.

Here’s a screen capture:

(In case it’s not self-explanatory: the Arduino code and the serial monitor are on the left, the Processing code and the flashing rectangle sketch that sends the signal to the phototransistor are on the right.)

The screen refresh rate for Processing is 60 Hz, or about five bytes per second. For GIRC, that’s about a line segment per second. I guess that’s okay . . . for now.

Posted in Uncategorized | Tagged , , , , | Leave a comment

Computer/Arduino Communication Via Phototransistor

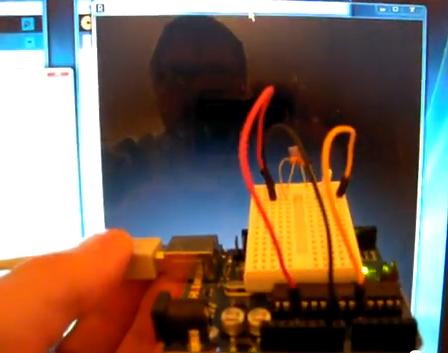
Here’s the basic idea: I’ll send commands to the Arduino by flashing a rectangle on the screen and having a phototransistor on the Arduino read the light level.

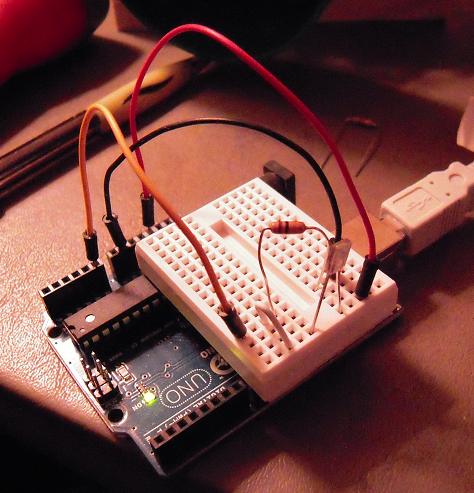
The above photo shows the test bed set-up. This is very similar to the circuit found in Getting Started with Arduino, except that I’m using a phototransistor instead of an LDR. The optimal resistor appears to be 10K ohms, as in the book.

If I can communicate via phototransistor, then I don’t need the USB/serial cable for communications. And if I can get rid of that, then I don’t need a serial-ttl cable or the Arduino platform. I can just stick an Atmel microcontroller on my robot and have the phototransistor read user commands right off the screen. This will save a lot of money.

As for how well it works — well, that’s why I built a test bed, to find out.

Posted in Uncategorized | Tagged , , , , , , | 1 Comment

Time to Clean Out My Spam Filter

I have a new hobby, collecting spam bot comments. Yes, I’m mystified too.

Bear in mind that spam bots attack blogs because they want their comment published with its embedded link that will help the spammer promote his product. Since spam is scattered as widely as possible, spam comments are as general as possible and typically lack references to the actual content of the blog entry. But that doesn’t mean they don’t get creative in their endeavors to entice you the blogger to publish their comment, and it’s the extremes they’ll go to that I find so appealing, even amusing.

Here, I’ll show you:

Someone actually went to the trouble of learning a computer language, programming a spam bot, paying for the servers and other infrastructure necessary to spread its message across the internet, learning administrative and network protocols. What they did not do, obviously, is bother to learn coherent English.

Ask yourself what kind of person seriously expects a human audience to read past even the first sentence of this:

I was going to obscure the links in these images, but I don’t think that’s really necessary here, the author has done more than enough obscuring on his own to ensure that nobody in his right mind is going to click on his links:

I would feel complimented by this one, but I bet he says this to all the (ten billion or so) bloggers he spams:

(On the other hand, I’m not sure where he’s going at the end!)

Some of the spam bot programmers have concluded that being positive is what catches them, so they try to simulate a realistic comment by inserting criticism:

Rife? Mye misspeling ins’t rief!

Okay, this one I am going to block out the link, but please note, this is from a website purporting to be about ‘smoking while pregnant’ and is all but accusing me of plagiarism for photographing my own cluttered work table in my own cluttered apartment:

This one has me almost wondering if it is spam:

— Yes, and I’ll have my followers contact your followers, and hey, maybe they can have lunch together.

Now this guy thinks he’s a comedian:

This guy takes a new tack, which instead of offering to be helpful, preys on the natural human tendency to be helpful:

(Presumably, your reward for ‘helping’ him will be even more spam. Joy!)

Once again, accusations of plagiarism are sure to rile up the blogger and elicit publication with an angry retort — NOT:

Now, haven’t we all heard of Jamorama?:

Sadly, tragically, my favorite spam post got deleted from overflow. It began with, “Not your best post, unfortunately,” and concluded with, “Perhaps you should try some Norwegian carrot cake!” And since I lost the comment, I may never have the opportunity to partake of the wily Norwegian carrot in its pastry form.

But at least I still have my second-place favorite comment:

What does this even mean? Probably it’s one of those obscene acronyms that the kids are into these days. But since it doesn’t show up on The Google, I’ll just leave it as it lays, and walk away.

I find ‘spambotiana’ to be entertaining, yet at the same time it is almost saddening to think of the countless dollars and work-hours expended all to be flushed away by my clicking of the ‘Delete Permanently’ command. Which I have just done — in anticipation of more entertainment to be sent my way in the days ahead by the seeming legions of spammers out there who are too clever by half to ever make an honest living.

Posted in Uncategorized | Tagged | Leave a comment

Robot Chassis with Plastic Ball Caster

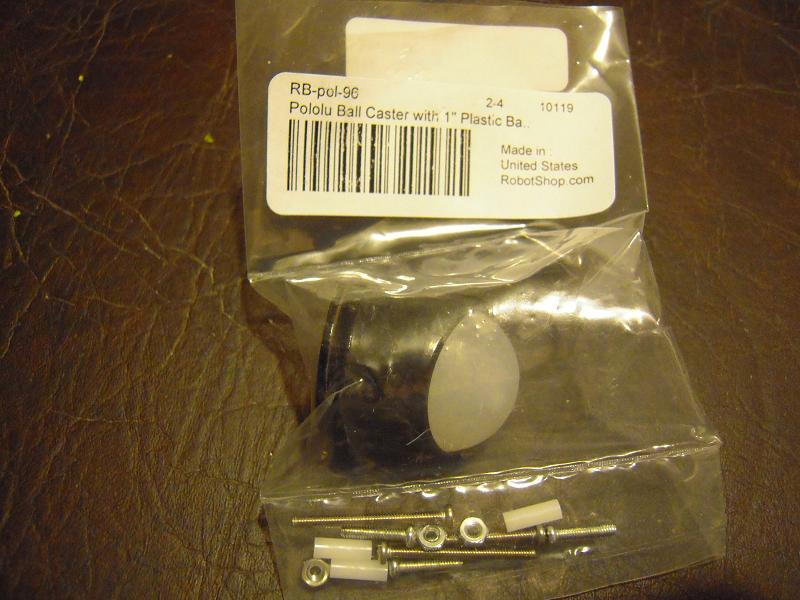
This is the 1″ plastic ball caster that I ordered from Robotshop. The white ball pops out of the black holder, which has three bolt holes to secure it to the robot chasis.

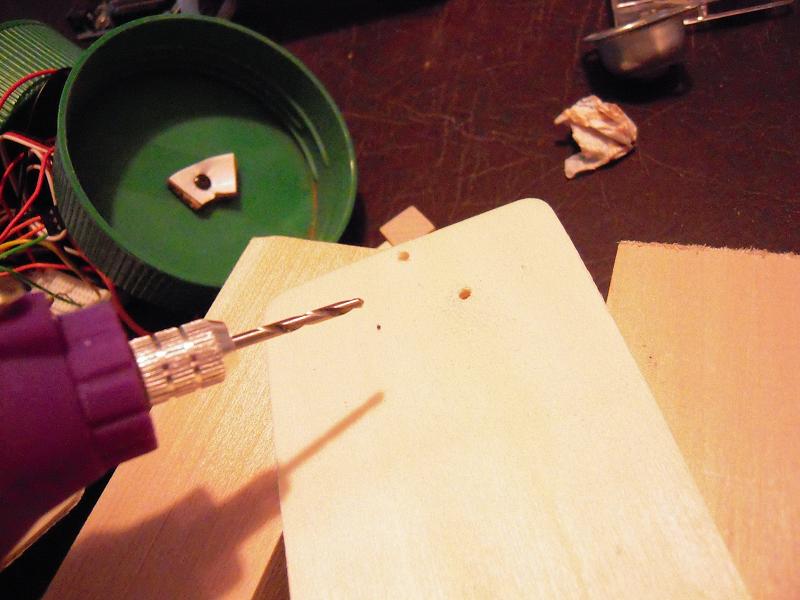
I positioned the holder on the wooden platform and used a razor pen to mark the drill hole locations. Then I used my little battery operated craft drill from Michaels like so:

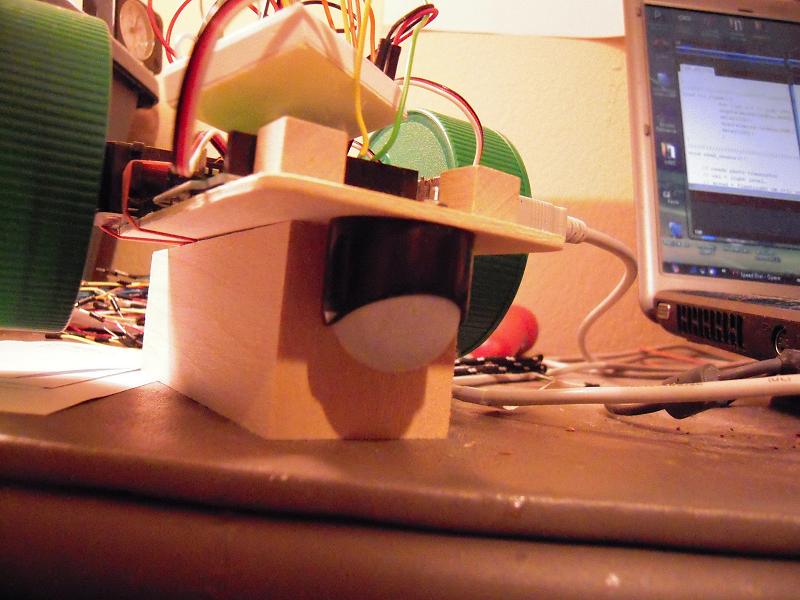
The bolts then went through the holder holes and the platform holes, and I fastened with the nuts so that it looked like this:

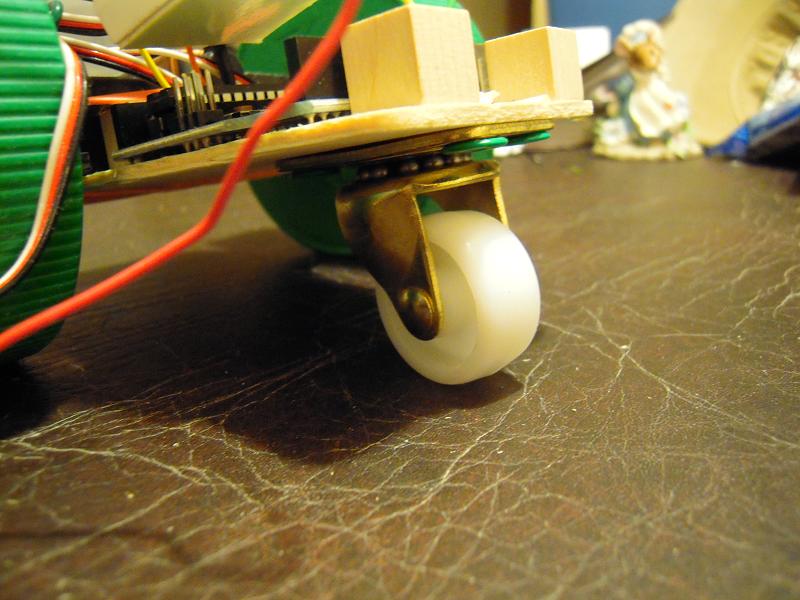
And this is what the completed mod looks like from below:

Moving from the wheel-caster chassis to the ball-caster chassis required removing and reinserting all the wires, a pain. But I tested with the square path program and it’s working. How well? Not as well as I had hoped. I think the wheels are a bit wobbly. I’ll see about getting plastic washers for them.

Now the main task is to have the Arduino convert the control codes back to turn angles and distances.

Posted in Uncategorized | Tagged , , , , | Leave a comment

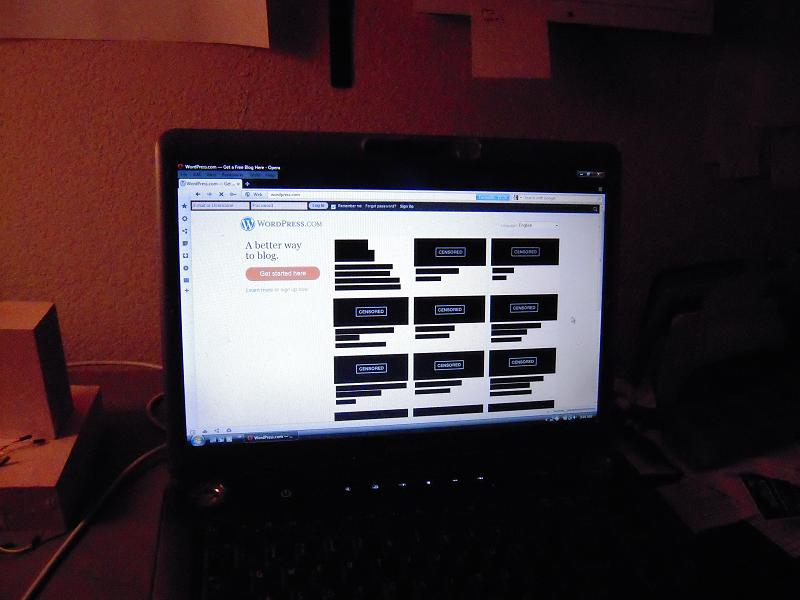
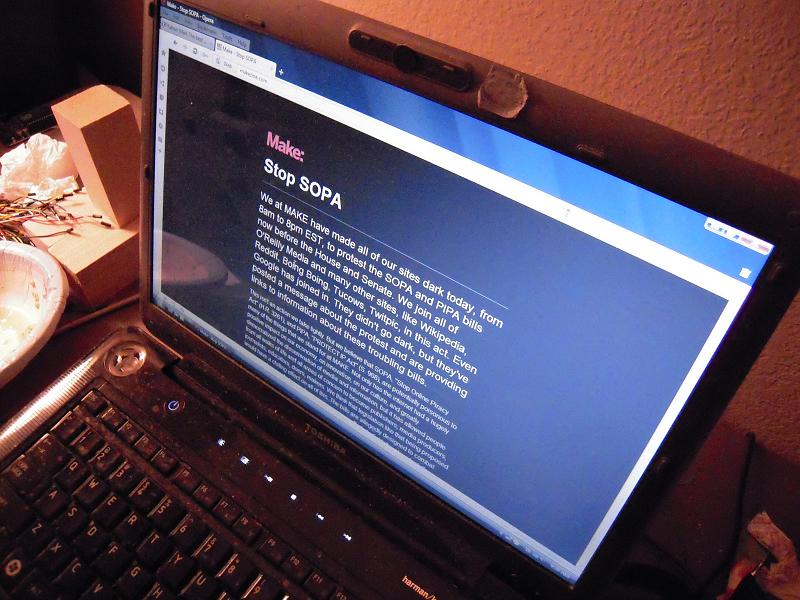
Going Dark

Posted in Uncategorized | Tagged , | Leave a comment

Casters for a Small Robot

Poor little cheapbot is undergoing surgery this week. The purpose is to change the caster wheel, but in the end the whole chassis will be replaced.

Because I’m trying to build my ‘cheapbot’ robot out of readily available parts, I went to various retail stores looking for small casters. The best I could find at the time was this one at Ace Hardware:

If you’ve viewed my videos, you may have seen that this wheel tends to stick when the robot is turning. So I purchased some small, dedicated-robot ball casters online. I bought steel and plastic ball casters.

I tested out the steel caster, and it seems to stick too. So now my hopes are on the plastic caster:

Unlike the steel caster, which could easily be thumbtacked to a prototype wooden chassis, the plastic ball will require drilling in order to be affixed to its chassis. So that’s where I’m heading next.

Posted in Uncategorized | Tagged , , , , , | Leave a comment

GIRC test drive on blocks

GIRC (Graphical Interface for Robotic Control) is a ‘sketch’ written in Processing that enables user to draw a path file, save and reload, and transfer control codes to an Arduino-brained robot. The magnitudes of the turns and distances haven’t been calibrated yet, which is why the robot is still on blocks.

(. . . I have the uncomfortable feeling that the turns are in the wrong directions. Don’t comment me on that, I’ll figure it out! And BTW, sorry for the camera work, which cuts off on the right.)

Floor trials are starting soon, but maybe I first need to replace that furniture-wheel castor with the robot-ball castor that I bought.

Posted in Uncategorized | Tagged , , , , , | Leave a comment

Disorganized workspace, organized mind (I hope)

Today I verified that the Arduino sketch still runs the servos, and then I did some organizing and planning.

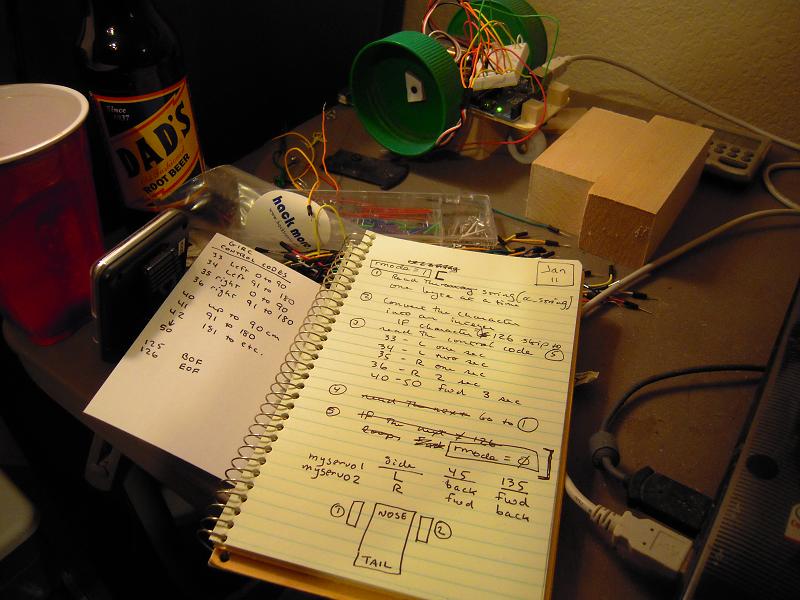
The note card on the left shows the listing for GIRC control codes (so far). On the right, I wrote out in words what I want the next phase of testing to do, which will be just to turn the wheels properly for the respective control codes. At the bottom of the page is an illustration to show how the servo commands relate to the wheel turnings.

If all goes well, there’s a fair chance that I’ll have the robot ‘on the floor’ by the weekend.

So I do have my thoughts organized. Now if only I could unclutter the workspace, and as you might guess, at the present time the rest of my apartment looks a lot like the state of this table.

Posted in Uncategorized | Tagged , , , , , | Leave a comment

A problem with Arduino arrays?

For days now I’ve been trying to troubleshoot why my computer and arduino won’t talk over the serial port. Finally, I took to commenting out all the arduino code and adding it back one line at a time.

I assumed the problem was with reading the serial port, but instead I discovered that when I included the lines that added the incomingByte values to an array, the arduino seemed to stop working entirely.

So instead I created a fifty character string globally, like so:

String cc_string = "12345678901234567890123456789012345678901234567890";

Then, in the loop() function, I replaced characters in the string with the incoming bytes converted into characters like so:

        cc_count = cc_count + 1;
        cc_string.setCharAt(cc_count,char(incomingByte));
        //cc_list[cc_count] = incomingByte;

And finally I read out the characters like so:

    int ib;
    for (int i = 1; i<=cc_count; i++){
      ib = int(cc_string.charAt(i));
      if (ib == 125) {
          tri_flash();
          delay(1000);
      }
      if (ib == 126) {
          tri_flash();
      }

The function tri_flash() causes the pin 13 LED to flash rapidly three times. And that it did, twice, which confirms that both bytes 125 and 126 made it over the serial port and into the string and then were translated out again.

I’m not sure why I couldn’t just load the incomingByte variable into an integer array. It might have something to do with the size of the array (1000). Dimensioning the array didn’t cause problems, but when I then put commands into the loop function to actually load values into the array, that’s when the program/sketch wouldn’t even acknowledge that the data had been received.

Surely there’s a more elegant way to deal with this, but given my lack of expertise, perhaps it’s for the best if I just take my kludgey solution and move on.

But does it really work, or does it just appear to work? I’ll find that out tomorrow when I try to make the servos respond to the stored commands.

Posted in Uncategorized | Tagged , , , | Leave a comment