One of the virtual worlds at Kitely.
One of the virtual worlds at Kitely.
Instead of a conventional status bar to track the progress of the data transmission, I decided it would be more fun to make a ‘progress bug.’ The bug would look like the robot and march across the screen as the data is being transmitted.
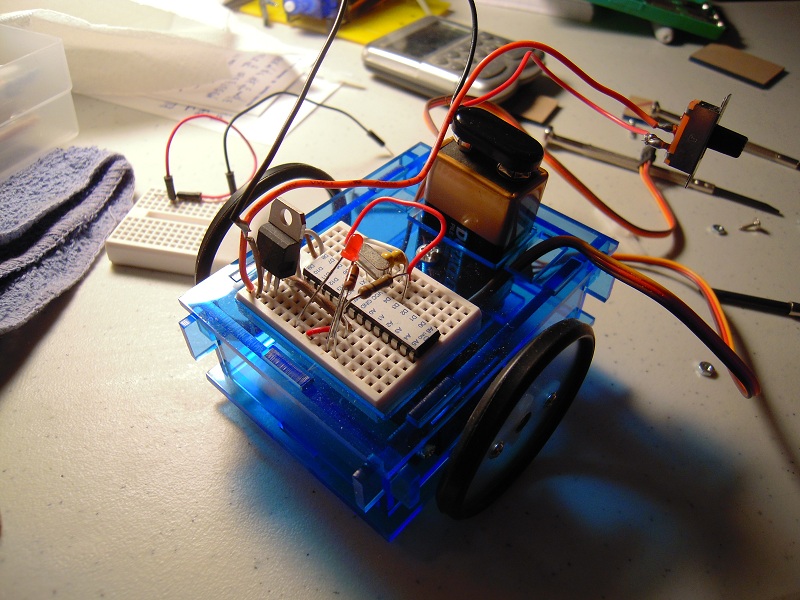
So the first task was to render Grisbot as a sprite. For reference, here again is how the robot looks in real life (prior to adding photocells):
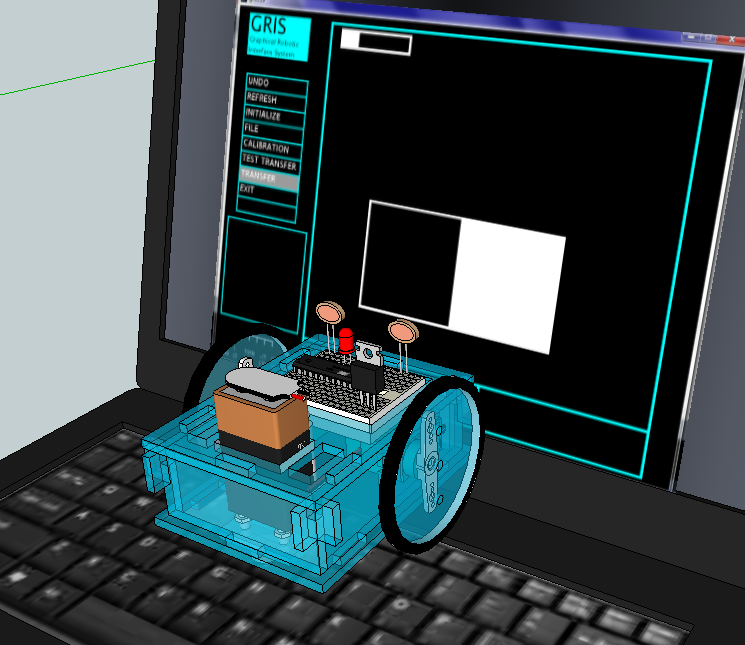
And here again is the rendering in Sketchup of how the robot is positioned to read data from a computer screen:
So here, on the communications screen of my Scratch program, is the Grisbot sprite patiently waiting for the computer screen to transmit data:
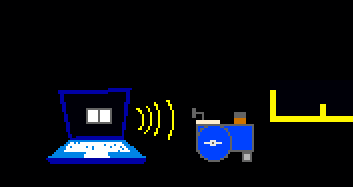
And here’s how it works in action:
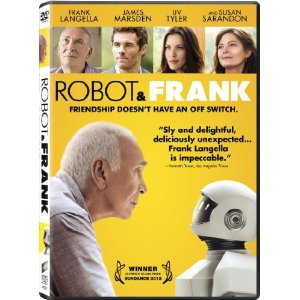
My personal award for Best Motion Picture on a Theme of Technological Interest goes to Robot and Frank.
Frank is an old guy whose family is finding it increasingly difficult to care for him as he descends into dementia, and so his son gets him a robot. The robot takes care of Frank by cooking meals, cleaning the house, and attempting to engage him in a more active, healthy lifestyle.
Obviously, the robot is the point of interest to the story from an engineering perspective, because Robot is a very plausible creature. So plausible that the story hardly qualifies as science fiction, and twenty years from now people who watch this movie might assume it’s simply about a man dealing with the hardships of old age.
When I first learned about the movie, I thought that having the protagonist be a former burglar was gimmicky. It’s not, it’s integral to the theme of how robots can be used and abused. I doubt a non-fiction documentary could have explored the subject as well from an emotional, personal, human viewpoint. Especially the last scene.
In this movie, no one is killed or tortured, hence it was passed over for an Oscar nomination for Best Picture. No one becomes a vampire or a zombie, let alone slays one (let alone slays thousands), hence Robot and Frank didn’t do well at the box office. Younger audiences might be bored because it appears to be slow-paced. I say ‘appears,’ because after going over the scenes in my mind, I realize that stuff I thought was just ‘filler’ or random was actually integral to the story. So while kids might be bored, the movie does make you think, and for some of us, thinking about things that really matter is a high form of entertainment indeed.
And as an older guy myself, I kept thinking, “I want one of those.” Indeed, looking around my apartment, I realize it can’t get here too soon.
(You can find the DVD on Amazon here, and Instant Video here, though I got it at Redbox.)
Perhaps I’m trying to fix something that isn’t broke, but I thought I’d try to improve the Grisbot:Scratch interface. Instead of clicking an icon in the corner to go to the specific waypoint data, you now click the waypoint sprite and the data is displayed. I think this makes the map more ‘interactive.’
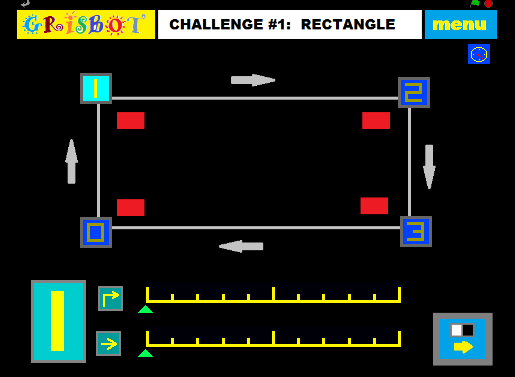
If there’s anything I don’t like about Scratch, it’s the low resolution. Circles and numbers made in MS Paint were looking jaggy, so I decided to make the waypoints into squares and hand-draw the numbers. It still doesn’t look professional, but it’s as good as I can get at this point.
Now onto the next page:
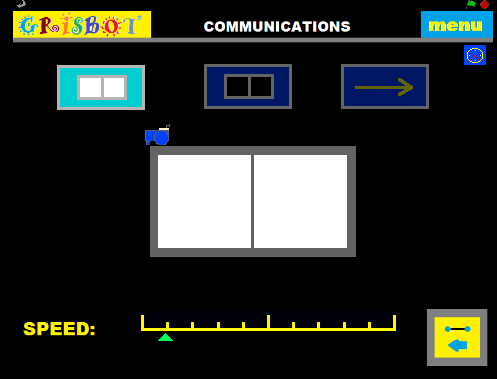
I have a stop watch sprite in the upper right hand corner. Click on it and it shows the elapsed time (not shown here). The idea is that the user can time how long it takes to complete the challenge as a form of competition.
There is also going to be a little robot ‘bug’ that marches atop the flashing rectangles, going from left to right as the data is sent, so that no one need ever ask, “Are we there yet?”
I want to make some more challenges, and add the capability to have more than four waypoints. That’s what will keep me busy this upcoming week.
This is a brief video demo of the Grisbot user interface in the Scratch programming language. The servo timing scales move according to the ‘glide’ command, and to me at least are reminiscent of the diagnostic readouts in Dr. McCoy’s sickbay.
The low-cal button on the second page should go dark when the transmit button is pressed. I will fix.
The flash speed is set at a slowpoke one-second interval for diagnostic purposes. I’ll soon find out how much faster I can go now that I’m assured the data is transmitting.
I have yet to write a program for the robot to interpret the data transmission from Scratch, but that should require only minor tweaking of the program I wrote to receive data from Processing.
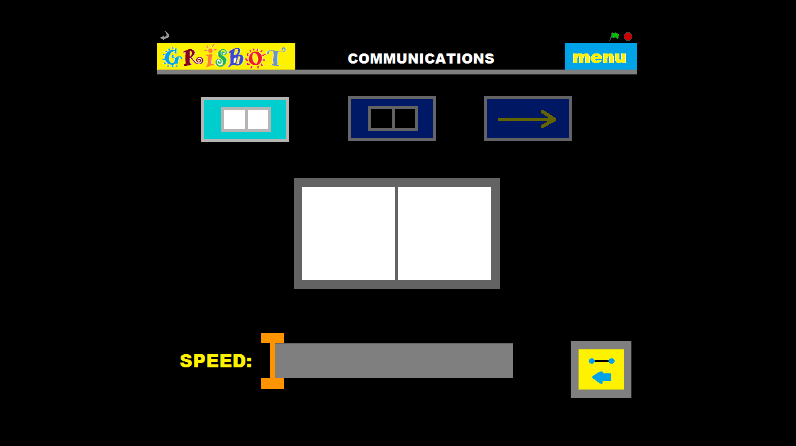
This communications screen layout is an improvement over the one I used in Processing. The user goes to the comm screen, holds the robot up to the screen and turns it on, and calibrates the high values. Then the user clicks the low button (top, middle) and calibrates the low values. Then the user clicks the transfer button (arrow) and the data is flashed to the robot.
The orange slider on the bottom adjusts the transmission speed. Too slow is inefficient, too fast may cause errors.
At this point, it looks like everything is done for Grisbot Scratch except figuring out how to flash the data. Which, of course, is The Big One.
Suppose you click on one sprite and you want other sprites to move accordingly? I have that problem when I click on the waypoint button and want the turn and move controls for servo timing to show the values selected for that particular waypoint. Since all Scratch code must be attached to a sprite and triggered by an event, the solution is to use Scratch’s broadcast command.

On the left of this example, I click the wp_button sprite to change the waypoint, and at the bottom you see that this broadcasts the word ‘wpchange.’ On the right, you see that the move button sprite responds to the broadcasting of the same word. Now, there’s nothing special about the word ‘wpchange,’ it’s just the word that I chose to broadcast and receive. You could have a hundred, or a thousand, or who knows how many events occur in the coding of one sprite, and then broadcast them to other sprites to trigger respective actions, so long as you choose to broadcast and receive different words each time.
In a nutshell, it’s kind of like you’re making up a language for the sprites in your program to communicate with each other.
Having grasped and implemented this concept, I am now done with the servo timing slider bars. I’ll work on the left/right forward/back buttons next, and then it’s on to flashing the robot commands, and then I’m done with Scratch for now.
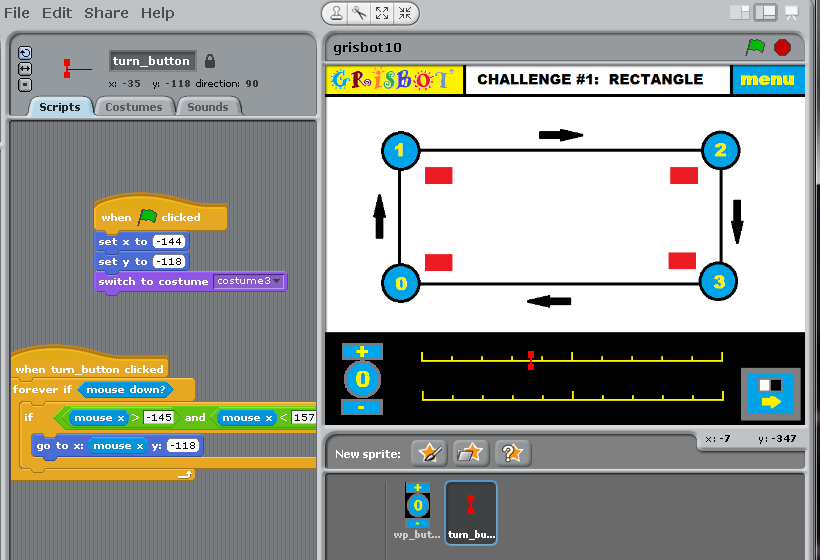
To acquire user input for the Scratch version of Grisbot’s computer interface, I’m using slider controls. In the above example, I’ve made a ‘slider icon’ in the form of a red ‘I.’ Position the mouse over the icon and hold the mouse down, and the icon moves with the mouse position along the scale. The icon position correlates to a servo timing value which will be saved in a variable for transmission to the robot.

The above screen shot shows the IDE (Integrated Development Environment) for Scratch.
On the left, the Scratch IDE displays a palette of programming blocks. In the middle are the programming blocks I attached to the sprite I created for incrementing the waypoint selection. (For the most part, you don’t ‘write’ Scratch code, you just drag and drop it.)
At the upper right is the screen as the program user will see it, and lower right is the collection of ‘stages’ and ‘sprites’ thus far.
Focusing on the middle: these program blocks change sprite ‘costumes.’ A sprite in fact is basically a collection of costumes, which are basically just images that the user creates. Here are the costumes I made for the waypoint button sprite:
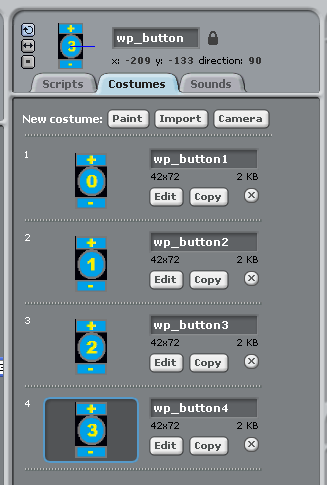
I’ve written (that is, dragged and dropped) the program code attached to the waypoint button sprite so that if the user clicks on the upper half of the sprite area, the waypoint costumes increment from 0, 1, 2, 3, and then 0 again. Likewise, if the user clicks on the lower half of the sprite area, the waypoint button costumes decrement.
By including a waypoint variable in the code, I can track which waypoint we’re on and display the servo input data accordingly. But that’s a topic for another day, perhaps.
Why does Scratch work this way? Well, because it’s designed to interest kids in programming, and the kind of programming that kids like most is game programming, and game programming requires animation, and animation requires moving and changing character images. Hence, my program adapts a paradigm for game animation into a graphical user interface. With mixed success.
Scratch may be an easy-to-use program language, but it’s taking me a while to learn how to use it. I think it’s because I have to unlearn assumptions from other programming languages in order to grasp concepts used in Scratch.
The first thing you have to do when creating a program is draw the user interface. This is actually pretty simple in Scratch, because you can simply draw an interface in a painting program and then load the graphics file as the background for your Scratch program.
Here is the main screen, the Challenge Screen:
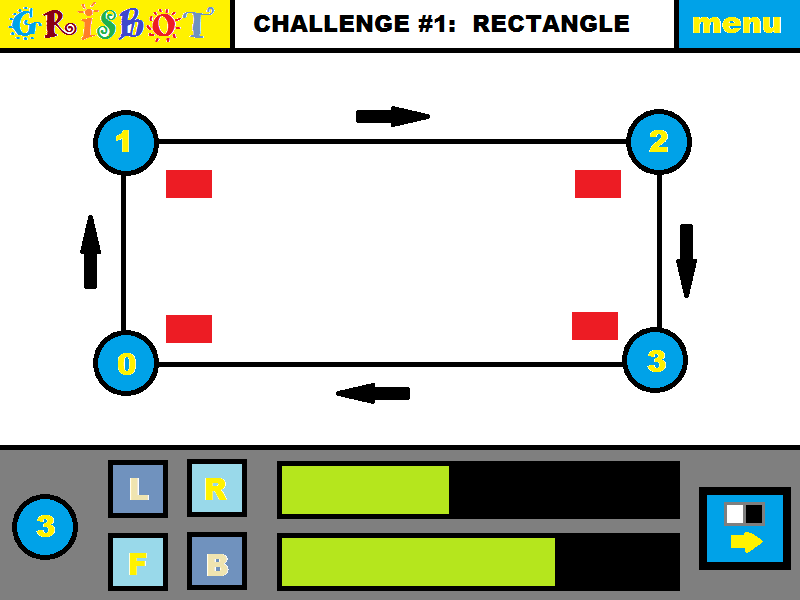
The Challenges are increasingly difficult paths that the user must program the robot to navigate through. (Note that this is different from my previous Processing-based GRIS program, in that now the path is pre-drawn.)
Rather than create the path, the user clicks on each waypoint of the pre-drawn path. Status information for the selected waypoint then appears at the bottom of the screen. The user selects the L/R (Left/Right) and F/B (Forward/Backward) buttons, then clicks on the green-on-black servo timing bars as desired. The green bar stretches to the click point, and the position of the click on the bar translates into a servo timing value.
As shown here, the user has selected Waypoint 3, and has chosen appropriate servo timing values. Since this is the last waypoint, now it’s time to click the button at the lower right and go to the communications screen, where the data for turns and moves will be sent to the robot as flashes of light. Then the user sets the robot down on the course (at Waypoint Zero, natch!) and away we go.
Which servo timing values are correct? Well, finding that out is the goal of the challenge. It may take several trial and error runs to get it right. I anticipate up to ten pre-drawn challenges, and users will have the option of making their own challenges too.
My hope is that younger kids will be interested in playing the game, mid-age kids will enjoy building the robot kit, and older kids will want to hack the robot with their own software and hardware modifications.
What if it turns out that I can’t send the light signals using Scratch? Well, then maybe I can write the program as a sketch in Processing that would run inside a web browser.

