

The above screen shot shows the IDE (Integrated Development Environment) for Scratch.
On the left, the Scratch IDE displays a palette of programming blocks. In the middle are the programming blocks I attached to the sprite I created for incrementing the waypoint selection. (For the most part, you don’t ‘write’ Scratch code, you just drag and drop it.)
At the upper right is the screen as the program user will see it, and lower right is the collection of ‘stages’ and ‘sprites’ thus far.
Focusing on the middle: these program blocks change sprite ‘costumes.’ A sprite in fact is basically a collection of costumes, which are basically just images that the user creates. Here are the costumes I made for the waypoint button sprite:
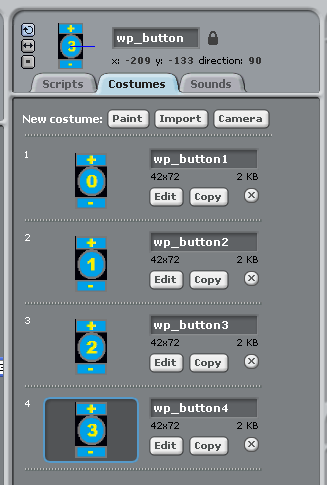
I’ve written (that is, dragged and dropped) the program code attached to the waypoint button sprite so that if the user clicks on the upper half of the sprite area, the waypoint costumes increment from 0, 1, 2, 3, and then 0 again. Likewise, if the user clicks on the lower half of the sprite area, the waypoint button costumes decrement.
By including a waypoint variable in the code, I can track which waypoint we’re on and display the servo input data accordingly. But that’s a topic for another day, perhaps.
Why does Scratch work this way? Well, because it’s designed to interest kids in programming, and the kind of programming that kids like most is game programming, and game programming requires animation, and animation requires moving and changing character images. Hence, my program adapts a paradigm for game animation into a graphical user interface. With mixed success.
Scratch may be an easy-to-use program language, but it’s taking me a while to learn how to use it. I think it’s because I have to unlearn assumptions from other programming languages in order to grasp concepts used in Scratch.
